DIY Muraling

In just a couple more weeks, life as I know it is going to change. We are expecting our first child, a baby girl. As any good designer-turned-dad would do, I went to work this summer on designing and painting a mural for the back wall of the baby's room.
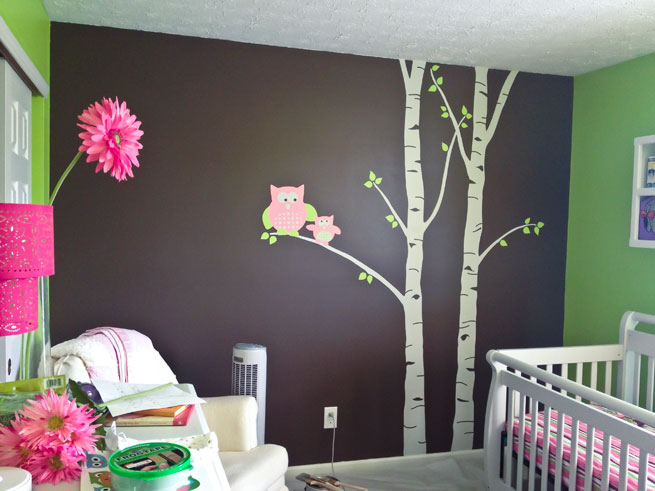
As you can see above, it turned out pretty good, and I'm really excited for my daughter to grow up in this room. If you're like me and have thought about doing your own wall mural, but didn't trust your ability to freehand it right on the wall, here's a method I came up with to make things a little easier while still getting those elusive sharp, clean lines. Disclaimer: I am a perfectionist, so I'll admit it got a bit complicated at times, but the final result was well worth the effort. Here's what you do…
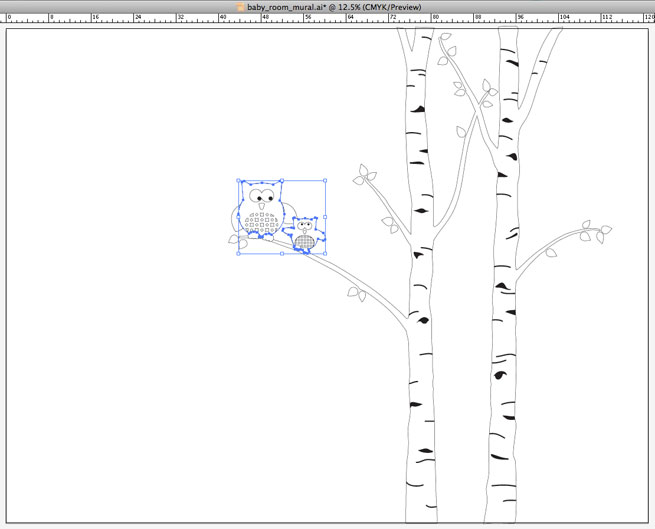
1. Design it
I drew the majority of it using the pencil tool in Adobe Illustrator. The owls and leaves were modifications of basic shapes. I created a document that was the actual dimensions of the wall, so the artwork was scaled at 100%.
2. Print and assemble it
It was a bit tricky, but figured out how to tile print from the Illustrator file… then Meghan helped me assemble and tape together the pieces.

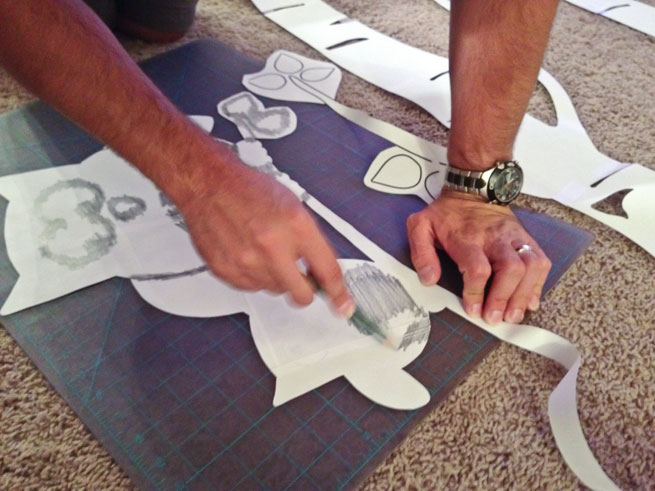
3. Cut it all out
Here comes the fun part (just kidding)… using an Xacto knife and cutting mat, I cut out the main outlines, as well as all the interior shapes. Exceptions were the owls and the loose leaf shapes… I cut a little bit around the outside of the lines to keep them connected to the main tree shape. A steady hand is needed for this part, but I find that I'm better with an Xacto blade than a paintbrush.

4. Scribble on the back
No, not the whole thing, just those areas where I had to cut around because they were too complex or disconnected from the trees. This is the first step of the poor man's carbon paper transfer method.
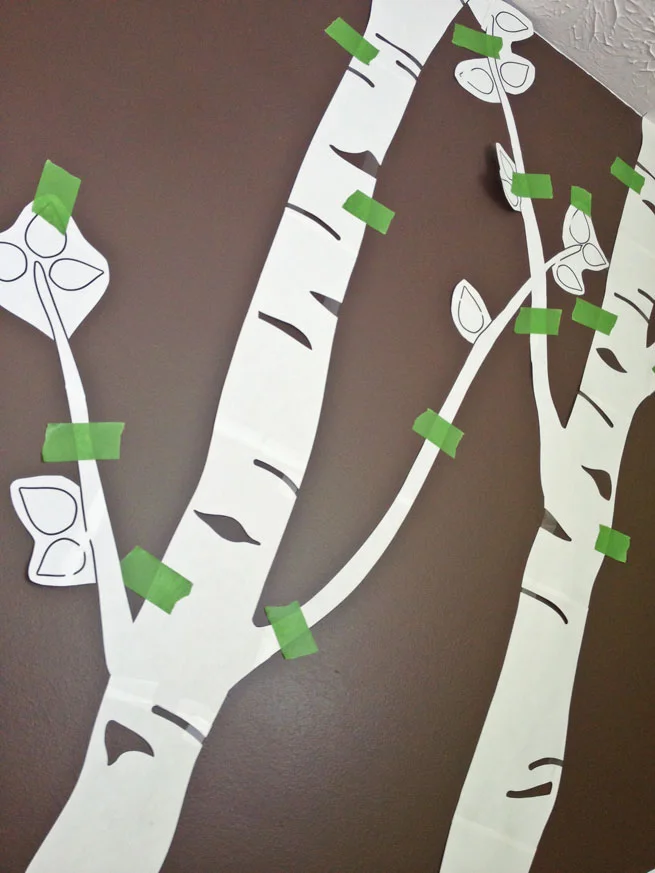
5. Tape it up
Now it's time to get it up on the wall. I started from the top of one trunk and worked my way down, making sure it lay flat against the wall at each point. Then I smoothed out the connecting branches and worked my way down the second trunk. I would recommend using painter's tape to put it up with.
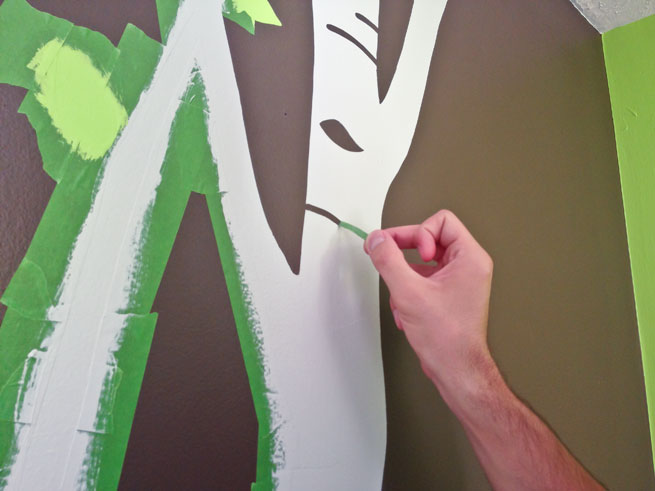
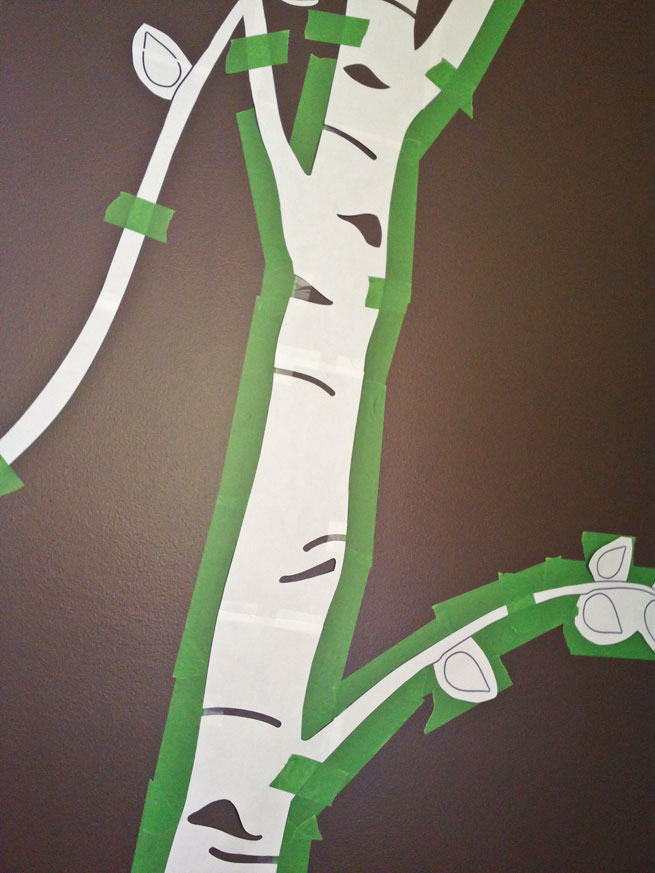
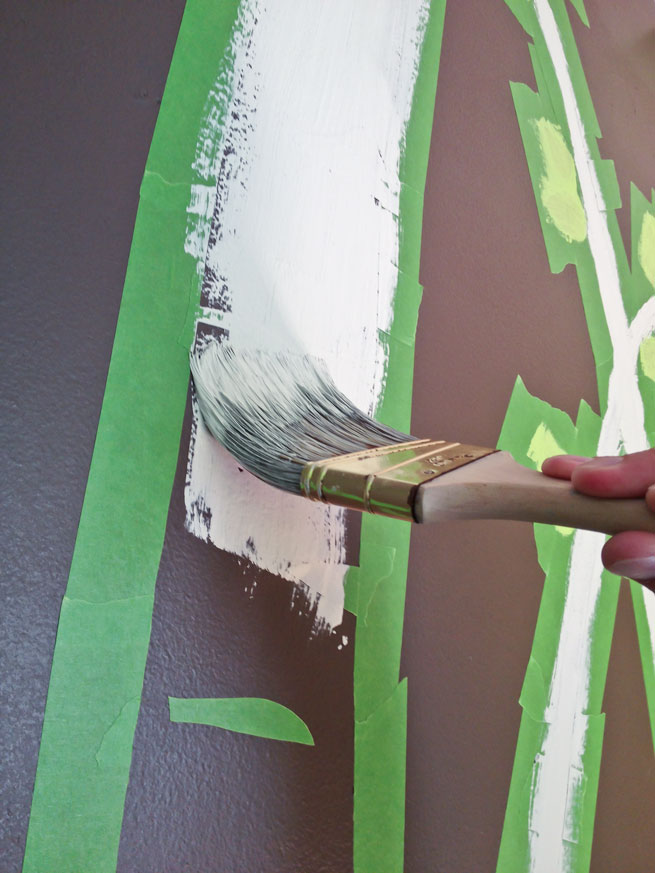
6. Layer tape under all the edges
I highly recommend using the green FrogTape pictured here and not the regular blue painter's tape. It has a special polymer in the tape that completely blocks normal latex paint, giving you super crisp lines with no bleed under. Tearing off small strips at a time, carefully slide them in under the edges of the cutout. You don't need to underlap too far… you still want enough sticking out to give you a good barrier between your paintbrush and the bare wall. For the interior cutout shapes, I put the tape on top, completely covering the diecut holes. Also make sure to layer tape completely under all the loose shape areas (e.g. leaf shapes).
7. Transfer the complex and outlying shapes
This is step two of the transfer process for the owls and leaves. I just took a ballpoint pen and traced all the lines, transferring the graphite on the back to the layered FrogTape underneath.
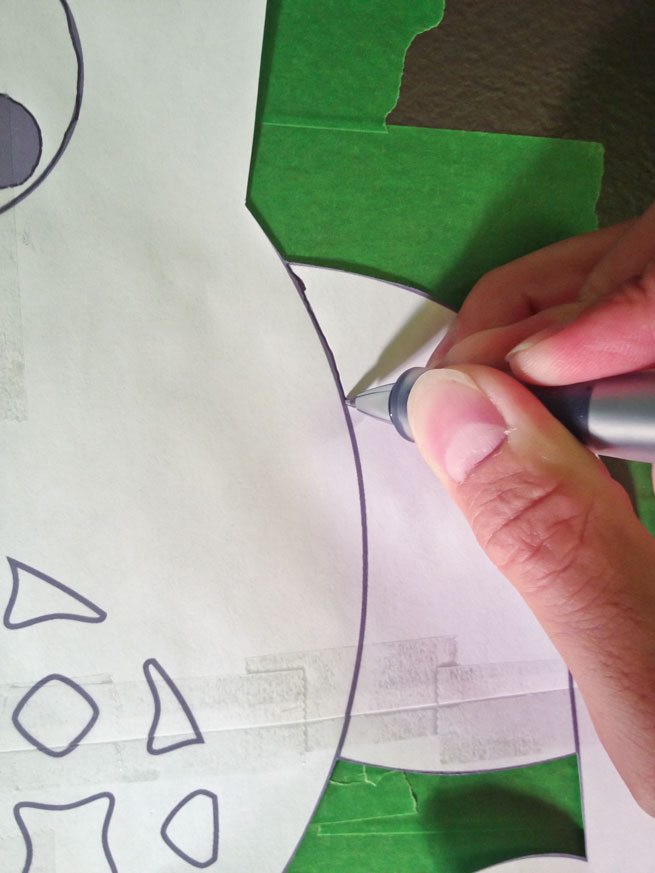
8. Cut it out again
This was by far the worst step. If you are a normal sane person, you will likely throw your hands up in disgust and call it quits at this point. I wouldn't blame you. I questioned whether it was really worth it at this point. Taking my Xacto, I retraced/recut all the lines, edges, and interior shapes. Problem was, if I cut too deep, I cut lines into the drywall, and if I cut too lightly, it wouldn't cut through any places where the tape overlapped. After several times of going over the same cuts, I finally got it.

9. Peel off the paper template
What's left, hopefully, is your outer boundaries and your inner shapes. I then went through and removed all the inner portions of the tape that were inside my tree outlines. What's left is a perfect, taped-off stencil that's ready to paint!

10. Paint!
With the stencil in place, I was able to use a fairly large brush and knock out the tree trunks and leaves in no time. The owls took a little more thought and steadiness of hand… but basically I just did the large sections first, then peeled away layer by layer of the tape as I finished each section. I only had to freehand a couple of the color-on-color boundaries.
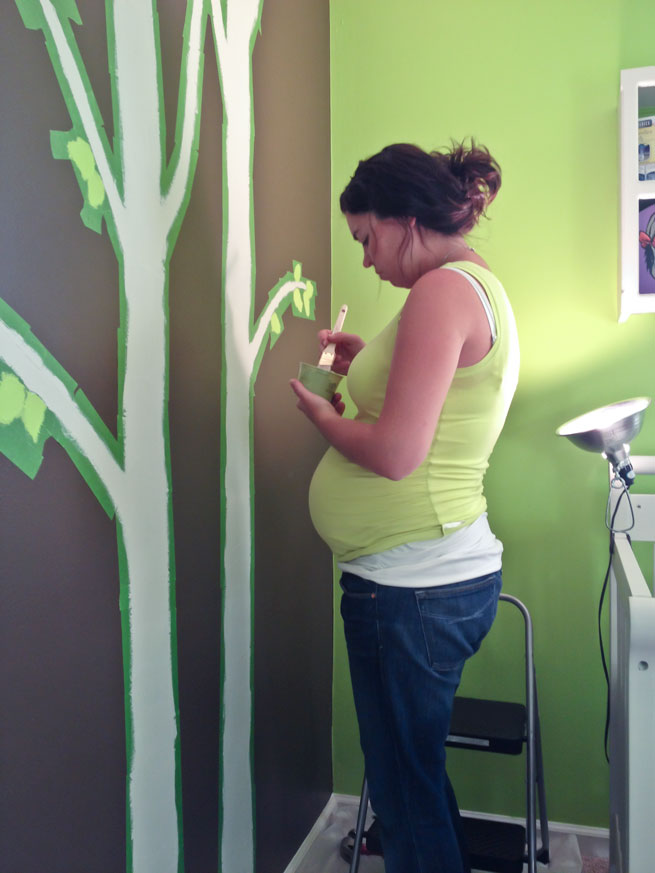
11. Fill in the details
This was also one of the harder parts… but I really did this to myself. Word to the wise: avoid tiny shapes, unless you're up for a challenge! I used a very small artist's brush to fill in these holes.

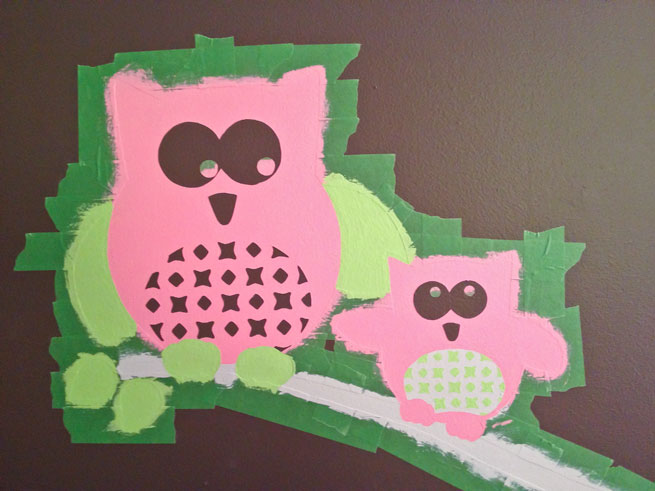
12. Remove the tape and "Voila!"
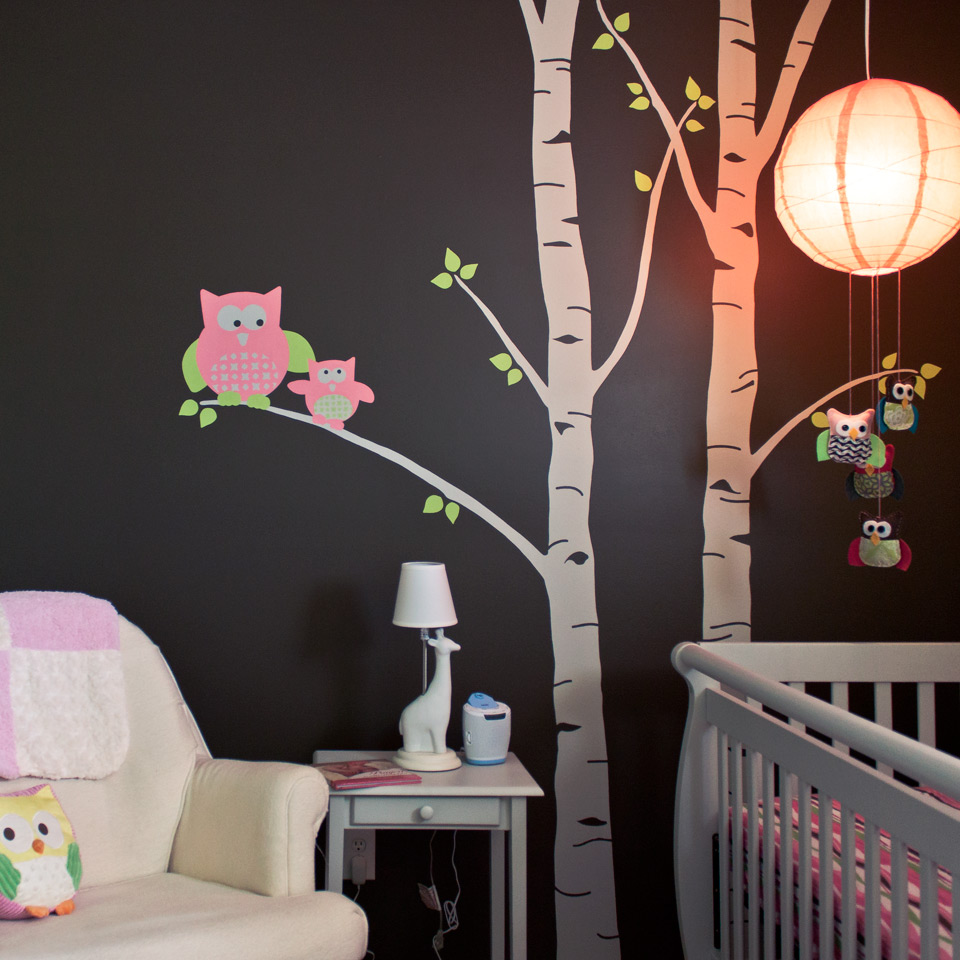
And there you have it… the finished wall mural, void of freehand mistakes and looking as sharp as a vinyl wall cling. On second thought, why didn't I just go find one of those and put it up? Oh well, no regrets now. It took some doing and some time, but we're really pleased with how it turned out, and can look back on it with pride. For more pictures of how the whole room turned out, check out the photos on Facebook.