Hello Christmas

Christmas is without a doubt my favorite time of year.
Well, besides the warmth and beauty of spring, I should say, but I'm talking about holidays here. Christmas is definitely the best. No matter if the 11 months that proceeded were good or bad, Christmas is a time when all can be made right through the spirit of giving. After all, God Himself gave His very best to us, which is the very cause for our celebration.
For HellothisisJeff Design, the past year has been very good. And so it's out of sheer gratitude that I wanted to create something special to send to each of my clients, vendors, and supporters that have made this a great first year of business. The special gift I came up with was a custom-designed greeting card that folds into a Christmas tree ornament.
The Process
Before designing any of the artwork, the first thing I worked on was solving the riddle of how a flat, folded card could turn into a 3-dimensional hanging ornament. I was inspired by some origami websites like this one. After several failed attempts at creating a mock-up, I finally arrived at this one.

Next, I chose the paper. I wanted something that could give it some holiday sparkle, yet still feel homemade. The perfect paper ended up being Esse Pearlized White. I ordered large press sheets and envelopes to match.

Next came the design, of course. The message was a simple play off of my business identity: "Hello Christmas" with the inside reading, "Now it's time to say hello to the most wonderful time of year." To keep my printing costs low and the piece fairly simple, I went with a two-color design… black and a golden tan on the front and back (which on the pearlized paper gave the appearance of silver and gold), and a deep holiday red and snowflake blue on the inside. I worked with a local printer who printed the design, created the die for the cutouts, and trimmed and scored the finished piece.


Once they were delivered from the printer, I did a bit of handwork in folding the cards and attaching the ribbons.

Assembly
My hope is that the card was fairly self-explanatory and that my recipients were intuitively able to figure out how to form it into an ornament. But just in case, here's a quick how-to tutorial.
Recipients received the card folded flat with the ribbon already attached in a matching envelope.


A simple instruction on the inside informed them that they could fold out the die-cut shapes in the card to form an ornament.

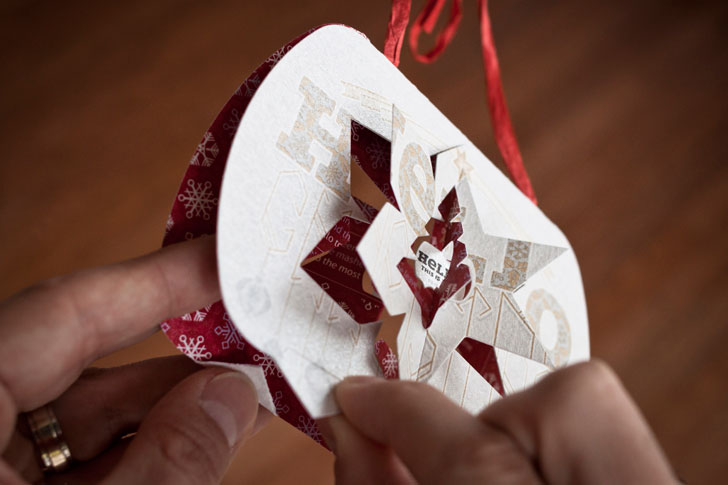
Starting on the front, the first fold can be made from the snowflake-shaped punch-out – separating it from the inner shapes, and folding it outward at a 45-degree angle.

Next, the star shape can be freed and folded at an opposing 45-degree angle.

The third fold is a little harder… the Christmas tree shape should be punched out and folded completely over, creasing the seams so that it stands out at 90 degrees on its own.

This same process can be repeated on the back side of the card. Then, to keep the card from splaying open, one of the bottom tabs can be folded over and through a slit on the front side as shown below.
Here's the final result…


This was definitely one of the most "out there" projects I've attempted, but a great learning experience in the art of custom die-cutting and folding. I hope this brings a small bit of joy to all those who have supported me and the business in the past year. It was certainly a fun experience putting it all together.